Showing posts with label The Pampered Chef. Show all posts

Tuesday, May 13, 2014

Game of Thrones Dinner Party - multiple recipes

A few weeks ago, I helped serve a Game of Thrones Dinner Party....just for fun.

The menu consisted of :
Honey Balsamic Chicken Legs - made by me
PopOvers - brought by a guest
Steamed Veggies - made by me
Multiple cheeses and wines - brought by guests
Elizabethan Honeycakes - made by me

I am going to give you a quick run down of the items I prepared for the feast. (Chicken and Honeycakes found via Pinterest)

Honey Balsamic Chicken

For this recipe I used chicken legs.  I always find it harder to cook meat on the bone, so I made the honey balsamic into a glaze and marinated the legs for a few hours.  I then baked the chicken legs at 375 degrees for 45 minutes.  When the chicken was done, I placed the legs (joint bone up) in a crock pot on medium and poured more of the honey balsamic glaze over them to continue cooking until it was time for the party.

Elizabethan Honeycakes

Now, I don't bake breads because for some reason I can't quite get it right, but I was willing to give this a try and though it wasn't perfect...it was fairly easy and super delicious.

Start by warming 1 bottle of ale ( I used a  Black Butte Porter by Deschutes Brewery).  I placed the beer in a microwave safe bowl and heated for about 45 seconds.  Then add one package of yeast, stir and set aside to froth.

The recipe says to grind sugar and almonds in a food processor.  I have almond flour on hand from making macaroons, so I just sifted my almond flour and sugar and added to the flour and salt.  Mix all dry ingredients together and make a well.  Pour your yeast/ale mixture into the well and slowly stir continuing to add dry ingredients into your mixture until all dry ingredients are combined.  My dough was super sticky.


I covered my bowl and left on top of the oven to rise, as I was cooking chicken and it was nice and warm.  Let rise until the dough has doubled in size, then knock it down and knead a few minutes before shaping buns.   Rather than shaping buns, I used my Muffin Pan.


 Let the buns rise for another 15 minutes
 and then bake for 10-20 minutes at 375 degrees, until slightly golden.


When buns are done, use a small paring knife to cut little holes in the top of the cakes, be careful not to cut all the way through the bottom of the cakes.  Drizzle honey into each hole, filling the space.  Let set so honey can soak in and continue to fill holes with honey multiple times to make sure your cakes are saturated. Sprinkle with a little powdered sugar for a fancy look and serve.


Steamed/Cooked Veggies:  This is not a recipe, just what I do for quick tasty veggies when it isn't grilling season.

In my Deep Covered Baker, I slice 1 small bag of baby red potatoes, 1 small bag of yukon gold potatoes, 1 red pepper, 6 cloves garlic, 1 onion, a package of mushrooms.....or any combination of veggies you prefer.  Drizzle with a little olive oil and a seasoning of choice, I prefer Chipotle.


Cover baker and place in microwave for 20 minutes!  PRESTO!  perfect potato and veggie mix :)


There you go!  3 recipes (and believe it or not...that isn't all I cooked that day!)

~Happy Husband Approved~

The honeycakes were ~Ginger Princess Approved~


Friday, May 9, 2014

Hot Artichoke and Spinach Dip - a party favorite


This is a recipe my friends ask me to bring to events, easy peasy!


Hot Artichoke and Spinach Dip - The Pampered Chef

I usually double the recipe (all photos below are of a doubled batch)

I use my Deep Covered Baker and make this, preheat the oven to 375 degrees.

I drain my can/jar of marinated artichoke hearts and chop in my Manual Food Processor

I use my Adjustable Course Grater to grate my fresh Parmesan cheese

Using 1 large (16+ ounce) package of spinach, I combine all my ingredients into my deep covered baker.

For the double batch I use 1/2 cup Mayo and Sour Cream...and don't forget some cloves of garlic :)

All ingredients before mixing


Once everything is evenly mixed, place lid on the baker and bake for 20-25 minutes.

You can serve with chips or crackers, but if you are feeling extra energetic....make Pita Chips.

Buy a package of pitas at the store, use a pizza cutter to slice into 8s.

Place on your pizza stone or a cookie sheet and place in over right when the dip comes out.

Cook 5-8 minutes on each side (until crispy) and serve with your hot dip!


~Happy Husband Approved~
~Potluck Approved~


Breakfast cupcakes - Fancy and Fast!

I love a nice simple morning meal!

I tested this recipe out when we had house guests and it was a hit.

Breakfast Cupcakes - found via Pinterest

The recipe above is Paleo, I made some adjustments for our family :)

I purchased 1 lb. of smoked ham from the local deli, and a small wedge of smoked Gouda cheese.

Preheat the oven to 400 degrees.

In my Muffin Pan, I placed 1 slice of ham to create a "crust".  After shredding all the cheese into a bowl, I placed a small pinch in the bottom of each crust and cracked 1 egg right on top.  I then sprinkled with salt and pepper.

notice the 3 on the far right have no yolk, as my husband wanted egg white only.


 Bake for 20 minutes - ( 15-16 minutes for less firm yolks )


Scoop out and serve with toast or hashbrowns!

~Happy Husband Approved~
~Ginger Princess Approved~
~Happy Husband's Best Guy Friends Approved~
~Hangover Approved~

Thursday, April 24, 2014

Italian Turkey Meatball Wraps with Pesto Hummus and Marinara

My last Turkey Hummus Wrap was a serious success in our house and because I can't leave well enough alone, I wanted to experiment with the same concept, but new flavors :)

Previous Hummus Recipe HERE

For today's Hummus we used the electric food processor and combine the following:
1 can drained garbonzo beans
1/2 jar of Pesto
3 garlic cloves

Blend all together, if it is a little thick add just a touch of olive oil and blend a little more.


Then I set this aside to work on the next portions of the meal.


For my meatballs I combined 1 lb. of ground turkey and 1/2 of a diced onion.  I shaped into small balls and placed in my Mini Muffin Tin.   These are baked at 325 degrees for 15-20 minutes.


As the meatballs baked, I sauteed the rest of my onion in a little olive oil.  I then combined a can of tomato sauce (as I didn't have fresh tomatoes on hand), as well as oregano and Italian seasoning.  If I had red wine on hand I would have added 1/4 cup to the sauce, I love the way it brings out flavor!


Once you meatballs on fully cooked you can then assemble your wraps.  We used whole wheat wraps that were low in carbs and calories.

Spread some hummus on your wrap, add a few meatballs, cover in sauce and PERFECTO!  Italian Turkey Meatball wrap with pesto hummus and marinara sauce!


~Happy Husband Approved~
~Ginger Princess Approved~

Tuesday, April 22, 2014

White Lightning Chicken Chili ( white bean ) and Artisan Bread

Ok...I have been so busy making Macaroons (recipe to come) and prepping for events I am cooking for that I have run sorely behind.

I apologize but promise the newest recipes are winners!

White Lightning Chicken Chili


Recently a friend made white bean chicken chili for a potluck and I was inspired to try making my own.  Luckily The Pampered Chef had a great recipe to start with.   I prepared the chili in the morning and placed in a slow cooker for the day to serve for supper.  If you are making to eat right away, the RockCrok Dutch Oven would be an excellent choice :)

I started by making my chicken in the Deep Covered Baker .... As I have said, this is my "go to" way of preparing chicken now.  A little olive oil in the bottom, 2 chicken breasts brushed with a little more oil, cover and cook 5 minutes on each side! 


Once the chicken was done, I chopped in my electric food processor quick. 
 I wanted nice hearty chunks of chicken.

Next I sliced 1 jalapeno and 1 onion and placed in a saute pan to cook.


While my vegetables were cooking, I drained 1 can of Great Northern beans and placed in a bowl.  I opened and drained 2 more cans of great northern beans and placed in a bowl to the side.

To my bowl with 1 can of beans, I used my Garlic Press to place 6 cloves of garlic in the bowl.  I then mashed the beans and garlic together.


At this point I added the chicken broth, vegetables and mashed beans to my slow cooker with the chicken and mixed well. I added 1/2 a package of taco seasoning and the juice of one lime and mixed together again.

  I allowed it to cook on high for 2 hours and then low for 4 hours. 
 I stirred it all occasionally and checked flavor.

About an hour before serving I mixed a little cornstarch and water together and added to the soup to thicken.


Now during the hours that my soup was in the slow cooker, I was also making my first loaf of no knead artisan bread :)


I started by placing 3 cups of whole wheat bread flour, my yeast, and salt in a mixing bowl.  I also added some Parmesan Garlic Dipping Seasoning to the mixture for some added pizazz!  I mixed together and then added my 1 1/2 cups water and 3 Tbsp. oil.  The dough is slightly sticky.


I lightly oiled the bottom of my clean (it had previously made chicken) Deep Dish Baker.  I placed my ball of dough directly in the Deep Dish Baker and covered in Plastic Wrap.  I allowed it to rise about 4 hours.


I sprinkled a little flour over the top and cut decorative lines into the top of the bread.   Bake at 450 degrees covered for 30 minutes and then uncovered for another 10-15 minutes.


The finished products, chili topped with shredded cheese and a splash of salsa.

This was not my husbands favorite meal, but I thought it was pretty tasty and hearty.  I had friends who gladly took all the leftovers off our hands :)

I don't feel my bread was the best and next time will plan ahead so I have more "rising" time before baking, but for my first ever attempt at making bread, it was pretty delicious...just needs to be prettied up a bit!


Tuesday, April 15, 2014

Buffalo Chicken Baked Ring

So as I planned the meals for this week, I picked 3  recipes to try that would also stay within my 400-600 calorie supper meal guidelines. I also wanted items that were "soul foods" in our house.

The first recipe is  Buffalo Chicken Ring which I found while skimming Pinterest.

This recipe serves about 6 people and is about 500 calories per serving.


I started with by placing 2 chicken breasts in my Deep Cover Baker.  I lightly coated the chicken with olive oil and sprinkled about 1/4 package of Hidden Valley Ranch mix over the top.  I then placed the covered dish in my microwave for 5 minutes, flipped the chicken and cooked another 5 minutes until fully cooked.

While the chicken was cooking.  I mixed my ranch dip.  I added the remaining mix to 1 - 8oz package of fat free cream cheese and stirred until fully incorporated.


I then set this mixture aside and prepped my baking pan. 
 I continue to wish I had a Large Pizza Stone, but used a baking sheet at this time.

This is 2 cans of reduced fat crescent rolls.
When my chicken was fully cooked ( the deep covered baker makes the most moist chicken ever!) I cut into chunks and used my electric food processor for the first time in my life : ) This was fantasic!


Once my chicken was finely chopped, I combined with my ranch mixture.  You may notice that I am not adding the celery that the original recipe calls for, I truly dislike celery so this was my option of change.

Add your desired amount of Frank's RedHot...I like it spicy. I used about 3/4 cup.

I added about 1/4 cup of shredded fiesta style cheese to the mixture as well.

Now to scoop the buffalo chicken mixture into your ring.


again, I added 1/4 cup of shredded cheese to the top of the ring.

When you wrap your ring, lift the crescent up and then angle to one side, continue in the same direction with all crescents all the way around.  
I pinched the dough together in the center of the ring and any holes around the edges.

Bake at 375 degrees for 20 minutes.


Cut into 6 pieces and serve :)  This is most definitely ~HAPPY HUSBAND APPROVED~ he was grinning ear to ear with this one!  Because I made this to our adult taste, it was not served to the Ginger Princess.


This recipe took about a total of 35 minutes, start to finish.

Next time I may make with a blue cheese seasoning instead of ranch.

Friday, April 11, 2014

Turkey & Black Bean Taco Stuffed Bell Peppers

Hot diggity!  I am really enjoying trying new and healthy recipes.  I found this one on Pinterest, but I will be using it again and again with variations through out the summer.

http://www.pinterest.com/pin/212232201164142853/

Leads to this website:  http://clefoodgoddess.com/texmex-stuffed-peppers/

Now for what I did.

Preheat your oven for 375 degrees.

I cooked up my ground turkey with some garlic.  Once browned I added my reduced sodium taco seasoning. ( I am going to try to make my own taco seasoning this summer)  Then 1 can of drained black beans.


I washed my peppers, cut the tops off and scraped the seeds out of them.  I then filled the peppers with my taco mixture.  I used my Pampered Chef Muffin Tin for baking as this allowed my peppers to stand up nicely.  I sprinkled with some shredded cheese and baked for 20 minutes.


The recipe took less than 30 mintues in total and 2 stuffed peppers is under 500 calories :)

Short, Sweet, Simple and to the point!  Enjoy the great spring weather we are finally having.  We will see what I cook up next week :)

Wednesday, April 9, 2014

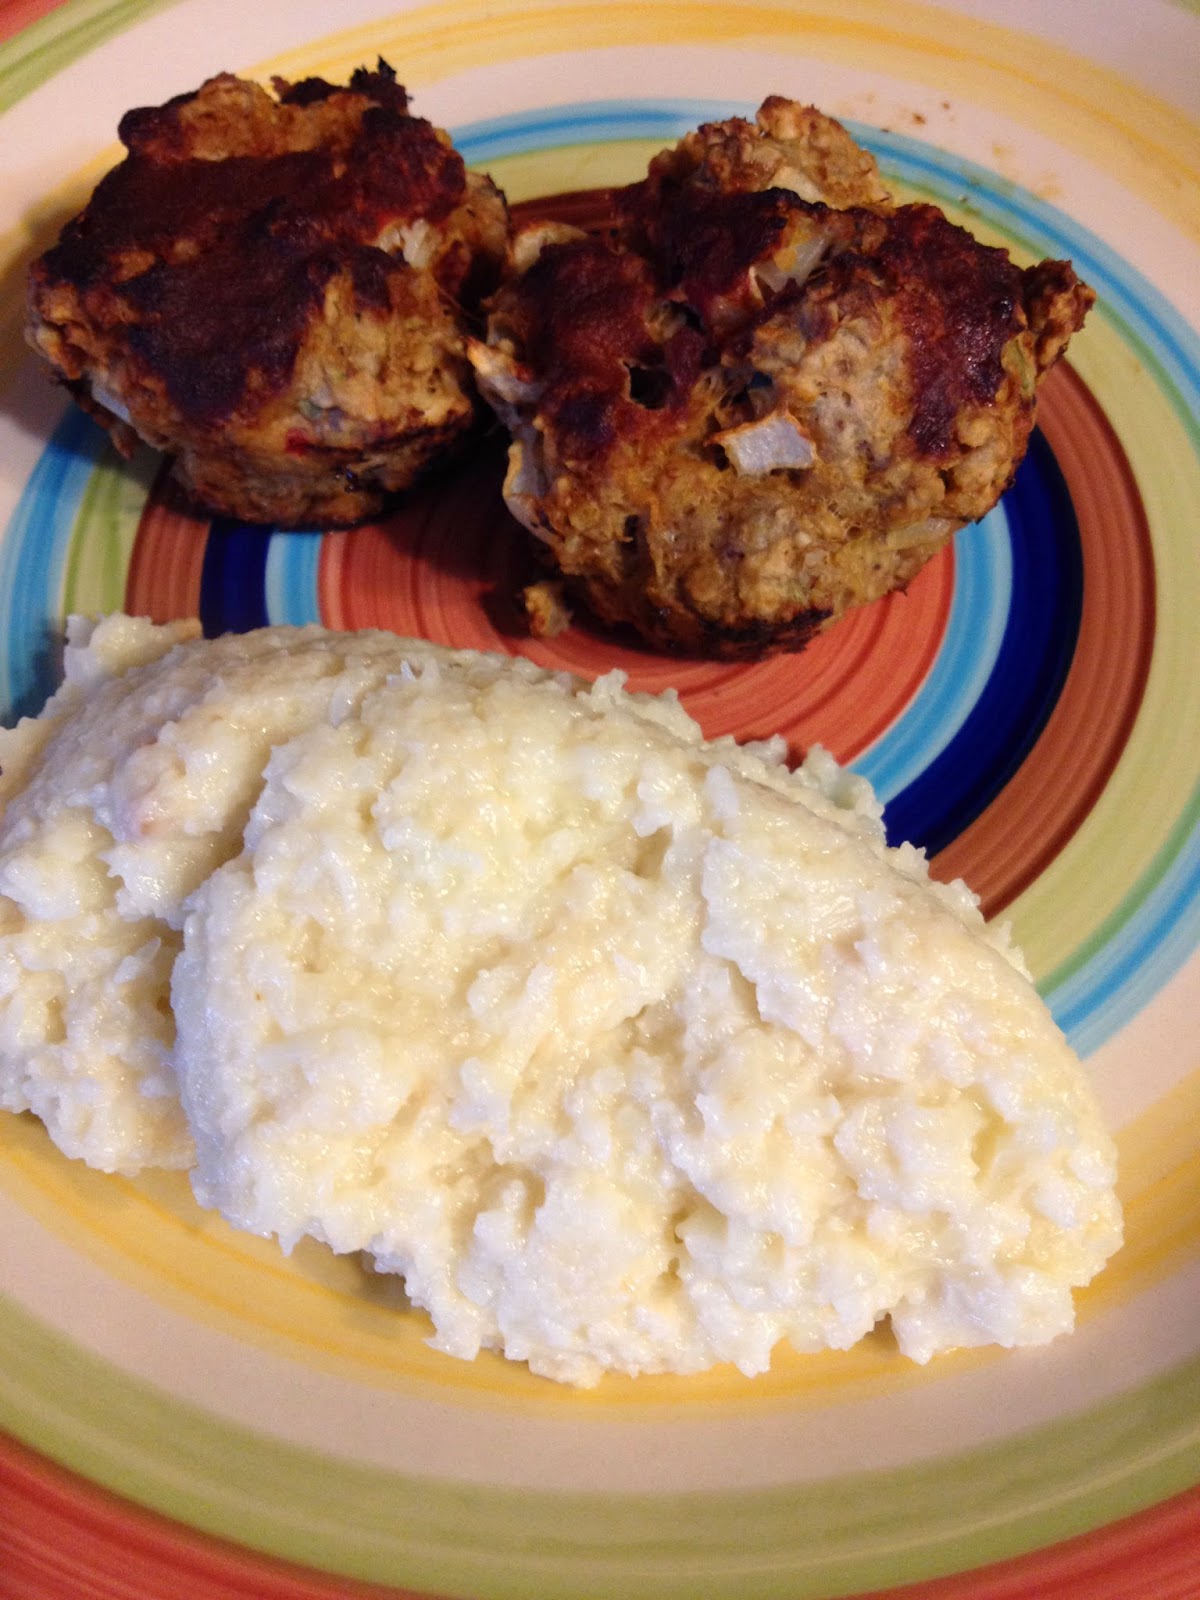
Mini Veggie/Turkey Meatloaf Cupcakes and Cauliflower Mash

This recipe isn't a recipe....it is a hodge podge of what I wanted to make combined with my leftovers from a potluck.  For the potluck I had made the Cucumber Lime Dip and some Fresh Salsa. 

For supper I wanted to make cute little mini meatloaf, so this is what I did.

In a mixing bowl I combined:

1 lb. ground turkey
1 1/2 cups Oats
1/3 cup fresh salsa
1/3 cup Cucumber lime dip
1 chopped onion

I then rolled into balls and filled my Muffin Tin

I baked at 350 degrees for 30-35 minutes.  I topped with a special secret recipe sauce, but you are welcome to top as desired.


For the Cauliflower Mash, I started with one head of cauliflower.  I washed it and cut into florets.  I then placed in a pot of water and boiled for about 15 minutes and drained. I wish I had the Large Micro Cooker, as this would have completely simplified the process.


After draining the cauliflower, I mashed with the Mix N' Masher.    I added just a dash of milk and some chipotle seasoning and 1 clove of garlic to taste.

This meal was under 500 calories. It is ~Happy Husband and Ginger Princess Approved~ though my husband still says he prefers mashed potatoes and gravy :)  At least he is honest and open minded enough to keep trying all my recipes!


Saturday, April 5, 2014

For the love of peas - Mock Guacamole

As I continue on my path of eating healthier foods, I am really looking for unique veggie recipes that call to me.  I love peas!  Well I really enjoy most green veggies, but peas are one of my favorites.  In the summer months I make a lot of fresh salsa and guacamole so this recipe seemed interesting to me.

Mock Guacamole

Please read the recipe, but I am going to tell you how I made it.

ALL IN THE MANUAL FOOD PROCESSOR!

I cut my tomato, onion, and cilantro and placed in the manual food processor with my peas.  I then added garlic with my garlic press.  A squeeze of lime and some salt and pepper.....and mix!


So simple and I thought it was delicious....my husband did not think it was close enough to the real deal.

I added this and some baked corn chips to my dinner of bell pepper chicken breast and alfalfa sprouts...so yummy and healthy!

Wednesday, April 2, 2014

Chicken with Maple-Mustard Glaze and steamed greens

 This week I started my first Isagenix 30 day cleanse and fat burning cycle.  As part of this "system" I am blending meal replacement shakes with fruits for breakfast and lunch and enjoying a 400-600 calorie meal with my family for supper.

Last night was the first night and I hadn't thought very far ahead, but knew I wanted a little zing with my supper.   I found this glaze recipe on the Pampered Chef site and decided to give it a try, as I had the ingredients on hand.

Chicken with Maple-Mustard Glaze


I started by making 2 chicken breasts in our  Deep Covered Baker 

Brushing just a bit of olive oil over my chicken and sprinkling with  Chipotle Rub  , then the covered baker was placed in the microwave for 5 minutes.  The chicken is then flipped and placed in microwave for remaining 5 minutes.  Please check to make sure your chicken in no longer pink in the thickest areas before serving.

We had purchased a bag of fresh spinach and kale from the store.  I wilted this over a medium heat in a covered pan with just a touch of olive oil.  Once wilted, I add a little chicken dripping from my deep dish baker, the syrup, mustard and vinegar.  A bit of salt and pepper to taste and it was complete.

I didn't have my camera on hand, but I plated the glazed greens and places the sliced chicken on top for presentation.  The maple-mustard glaze was a nice compliment to the chipotle heat :)

~Happy Husband Approved~ and healthy!

Friday, March 28, 2014

Crunchy Mediterranean Wedge Salad


This is a very easy, delicious and healthy recipe for the upcoming summer months. 
 I will be cooking this for a group this weekend
 and had a wonderful friend come over for my trial run. 
20 minutes tops, I spent most of the time plating to perfection :) 

Crunchy Mediterranean Wedge Salad

 4 boneless, skinless chicken breasts 

1 tbsp (15 mL) canola oil 

 2 tbsp (30 mL) Greek Rub 

2 small vine-ripened tomatoes 

 1/4 seedless cucumber 

1/2 small red onion 

2 heads iceberg lettuce 

 4 oz (125 g) feta cheese 

Sliced kalamata olives and Crunchy Pita Strips (optional)

 Dressing 

2-3 lemons 

1/3 cup (75 mL) canola oil 

1 tbsp (15 mL) Greek Rub 

 3/4 tsp (4 mL) sugar


Directions 

1. Brush chicken with oil; sprinkle with rub. Arrange chicken in Small Ridged Baker; cover with Parchment Paper.  * I used my deep covered baker without parchment paper.

2. Microwave chicken on HIGH 5-6 minutes or until internal temperature reaches 165ºF (74ºC). Set aside to cool. 


 3. Slice tomatoes with Simple Slicer on #3 setting. Slice cucumber on #2 setting and slice onion on #1 setting. Cut vegetable slices into quarters.


 4. Remove outer leaves of each head of lettuce. (Do not core heads of lettuce.) Using Chef’s Knife, cut each head of lettuce lengthwise into three 1½-inch-thick (4-cm) slices; arrange slices on Large Bamboo Platter. 

5. For dressing, juice lemons using Juicer to measure 1/3 cup (75 mL). Process juice, oil, rub and sugar in Manual Food Processor until blended. 

6. Remove chicken from baker to clean Cutting Board. Cut chicken crosswise into ½-in. (1-cm) slices with Santoku Knife. 

7. To assemble salad, place chicken and veggies on top of lettuce wedge, crumble feta with Easy Release Cheese Crumbler. Drizzle with dressing and serve.  *I added sweet potato chips as garnish instead of crunchy pita strips

Mine doesn't look too bad compared to the recipe photo :)


Monday, March 24, 2014

Steak & Guinness Pie


I received this cookbook from my best friend on my 1st wedding anniversary.  He had moved to the NYC area and fallen in love with Tea & Sympathy.  It is a quaint little shop, 1 half sweets shop and cup'a tea to go and the other half exquisite eatery and tea service.  This past December, upon visiting him we made a few stops to this fine establishment, I fell in love too!  The tea, the desserts, the Steak & Guinness Pie :)  We had the privilege of speaking with the Grand Madam, Nicola, herself and she assured me that if I followed her recipe I would have superb Steak & Guinness Pie at home......I was terribly excited to try, but knew I wanted to wait until St. Patrick's Day.

Enjoying some Rose Tea while awaiting my Steak & Guinness Pie - Tea & Sympathy December 2013


 After my success with my RockCrok Dutch Oven when preparing French Onion & Mushroom soup a few weeks ago, I decided to test the great versatility of the pot again with this recipe.


 First I cubed my steak, I can't recall the cut of the meat as my husband is the one who purchased it.  You don't want anything too thick and want to cut into small cubes.  Adding 1/4 c. butter and a splash of olive oil to my dutch oven on Med-High heat, I seared the meat until brown and mostly done.

As the meat cooked, I cut my onions.  I usually do all my onions by hand, but decided to try my Simple Slicer.  I will rarely cut onions by hand again.  This little device was amazing to use and easy to clean ( I have been using it non-stop now for a week )

When the meat is done, scoop into a dish a set aside.  Now place your onions and garlic into the meat juices and continue to cook.  I don't like my onions mushy soft, so when they were brown and to the consistency I appreciate, the meat was replaced to the dutch oven. 
Meat, onion and garlic

To the meat, onion and garlic combination, I added flour, paprika, brown sugar and tomato puree.  Cook for about 5 minutes to make sure all ingredients are combined. 
Flour, brown sugar and paprika


 Now add 2 1/2 c.  Beef stock and 2 1/2 c. Guinness  - for the Guinness this is roughly 2 bottles.  
Stock and Guinness added
I added my herbs and bay leaves, turned to a Med-Low to simmer, stirring occasionally.  
I took a quick taste test.  I prefer savory tastes, so did go outside the recipe and added 1 1/2 tsp. of cayenne pepper to help eliminate the brown sugar sweetness.


Next for the Pastry:
I am not a pastry making person and knew this could be the challenge for me.

Sift your flour and salt into a bowl and "rub" butter and shortening in until your mixture has the consistency of crumbs. Create a well, add your cold water and mix until a dough forms.  Roll quickly into a ball with your hands and place in cellophane and in the fridge for 30 minutes.


After 30 minutes, I rolled my dough out on the counter with a well floured counter top and rolling pin.

I used the dutch oven lid and a faux cookie cutter for the pie.  This is where I learned that the RockCrok Everyday Pan or the Deep Dish Pie Plate may be better options.  I had troubles creating a seal of the crust around the outside of the dutch oven. 
 Make sure to brush a little egg on your pastry and then bake for about 1 hour.

I dyed left over dough and hand cut shamrocks for a lil flare.


Regardless of the small pastry struggle, this recipe was amazing!  My husband and I were both pleased with the results and he was happy for my addition of cayenne pepper to offset the sweet.